
Post-treatment
with Apple Aperture
Following
the breaking news that Apple will cease the updating of their Aperture photo
software, I was really disappointed considering the good services that I have
experimented over the years in using it.
I must add
that I am not really fond of most other photo editing software that are far
more related to graphic designers or “photo painters” as I like to call them.
Post
treatment in photography is a subject of long controversy and this is not a new
theme. It began right from the start of this form of art expression.
Even if I
really appreciate certain works done by “photo creators” I do have a more
classical view in doing and showing photographic work. And it starts by
pre-visualisation of your picture reality and transposition as near as possible
on the media of presentation. That can be seen as a modern translation of the
Ansel Adams precepts exposed in his books “The camera”, “The film” and “The
print”.
But enough
philosophy and more on photography!
What I love
in using Aperture is the way fundamental picture parameters are presented and
can be altered. Everything is based on the normal language of photographers.
For example all the exposure factors are simply listed in a very friendly user
way. Exploring the possibilities is easy.
Jpeg versus
Raw
This is big
debate since the beginning of digital photography. Suffice to say that all your
raw files will need to be converted in jpeg files to allow you rapid sharing of
your pictures. And that can be a bit annoying in term of delay. But the best
results will be obtained by starting with raw files. Lastly the raw files are
greater space consumers into your memory card and system.
Personally
I use raw files in very rare occasions.
Enhancing
your pictures
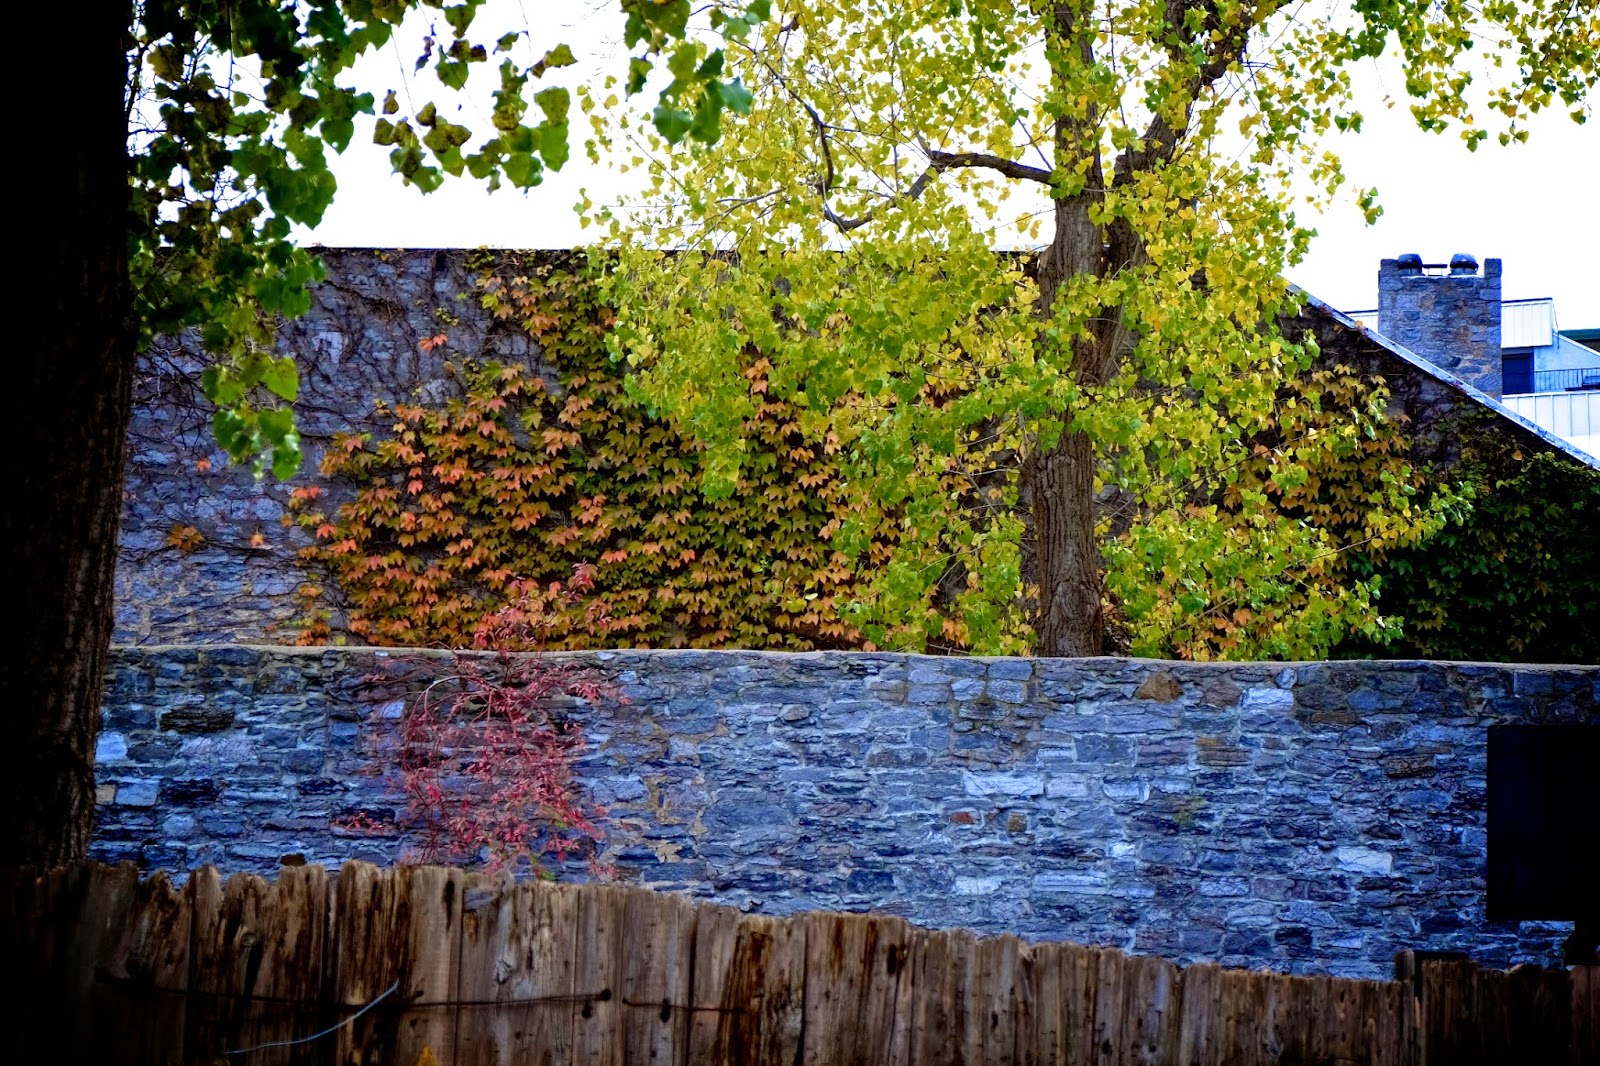
As a start,
many pictures need to be fine tune to correct small disparities from the
original light and framing conditions. Redressing the horizon line and choosing
a different frame cropping can be the first steps. Correcting the color
temperature of the overall picture can be the next step. I am not really fond
to use the tint correction but it may save some really off-color pictures.
 |
| Redressing and cropping |
 |
| Original Picture Taken |
Exposure is
a fundamental. Exposure correction will apply for the overall rendering light
distribution. The luminosity option can be used but result are often
destructive of the details contained in high and low light so you have to be
precautious. Working with the high and
low light detail correction option can be mandatory to recover good information
in these areas. I suggest increasing just a little bit the contrast setting to
give punch to your result.
 |
| Croping and Color Temperature |
 |
| Original |
 |
| Redressing, Cropping, Enhancing High-Light Details |
 |
| Original |
The others fine-tuning setting may be suited for particular needs on your picture. It is just a matter of experimentation. My only suggestion is to keep it simple by using one correction at a time and evaluate the result. Depending of your expectation and the way your picture-taking equipment behave, you will find a personal combination of settings that will be frequently used.

 |
| Black and White Effect (moderate contrast) |
There are a
lot of special effects that can be applied to your pictures. For myself I love
to transform color images in black and white by using the different types of
filters available. If you found that the color rendition is distractive you may
try these options.
“Painting”
with Aperture can be done with relatively ease if you invest a bit in learning
to do so. Dodging and burning image areas are a classical way to enhance your
picture. You can copy part of your image and reproduce it on another part. I
use this option to salvage some portraits mainly by removing distracting object
or person from the original image. Again it need a bit of learning.

 |
| Special "Retro" Effect |
There is
also an assortment of “special” effects that will alter more severely your
picture mostly in the range of classical photography rendering. That can be
interesting if you are using your image on a particular illustrating context
like anniversary or typical event. The more you will find applications for your
photos the more you will be motivated to do photography and post process the
results.
This short
presentation of certain applications of Aperture has been done as an incitation
for using it. My only hope is that Apple will develop its new iPhoto
application in retaining most of the aspect of the present Aperture.
.jpg)
.jpg) |
| Portrait Extract with Background Removed and Replaced. |
Aucun commentaire:
Publier un commentaire